User banning
Implement a user banning feature using plugins
Overview
This tutorial shows you how to add a user banning feature to your SuperTokens authentication flows. The guide makes use of the plugins functionality which provides the ability to ban/unban users.
How it works
The plugin makes use of the UserRoles feature to keep track of banned users.
When you ban someone, they get assigned a new role, banned, and their session gets revoked immediately.
Additionally, the default session validation logic gets overridden to prevent users with the banned role from accessing the application.
Caching
To avoid extra network calls during session verification, the plugin uses an in-memory cache to keep track of the ban status. The cache gets reloaded during the first session verification, after a server start, causing a slight increase in latency. If you are working with a serverless environment or with distributed applications, you can implement your own caching strategy through overrides.
Before you start
The user banning plugin supports only the React and NodeJS SDKs.
Support for other platforms is under active development.
Besides initializing the plugin, you also have to include the UserRoles recipe in your SuperTokens configuration.
Steps
1. Initialize the backend plugin
1.1 Install the plugin
npm install @supertokens-plugins/user-banning-nodejs1.2 Update your backend SDK configuration
import SuperTokens from "supertokens-node";
import UserBanningPlugin from "@supertokens-plugins/user-banning-nodejs";
import UserRoles from "supertokens-node/recipe/userroles";

SuperTokens.init({
  appInfo: {
    appName: "My App",
    apiDomain: "https://api.example.com",
  },
  recipeList: [
    UserRoles.init(), // Required: UserRoles recipe must be initialized
    // your other recipes
  ],
  experimental: {
    plugins: [
      UserBanningPlugin.init({
        userBanningPermission: "ban-user", // Optional: defaults to "ban-user"
        bannedUserRole: "banned", // Optional: defaults to "banned"
      }),
    ],
  },
});2. Initialize the frontend plugin
2.1 Install the plugin
npm install @supertokens-plugins/user-banning-react2.2 Update your frontend SDK configuration
import SuperTokens from "supertokens-auth-react";
import UserBanningPlugin from "@supertokens-plugins/user-banning-react";

SuperTokens.init({
  appInfo: {
    appName: "My App",
    apiDomain: "https://api.example.com",
    websiteDomain: "https://example.com",
  },
  recipeList: [
    // your recipes
  ],
  experimental: {
    plugins: [
      UserBanningPlugin.init({
        userBanningPermission: "ban-user", // Should match backend config
        bannedUserRole: "banned", // Should match backend config
        onPermissionFailureRedirectPath: "/", // Optional: defaults to "/"
      }),
    ],
  },
});
3. Ban users
3.1 Using the user banning interface
The plugin provides a complete administrative interface accessible at /admin/ban-user.
Before you access the interface, make sure that your user has the required permission, ban-user by default.
Read the role management actions page for instructions on how to add permissions to your users.
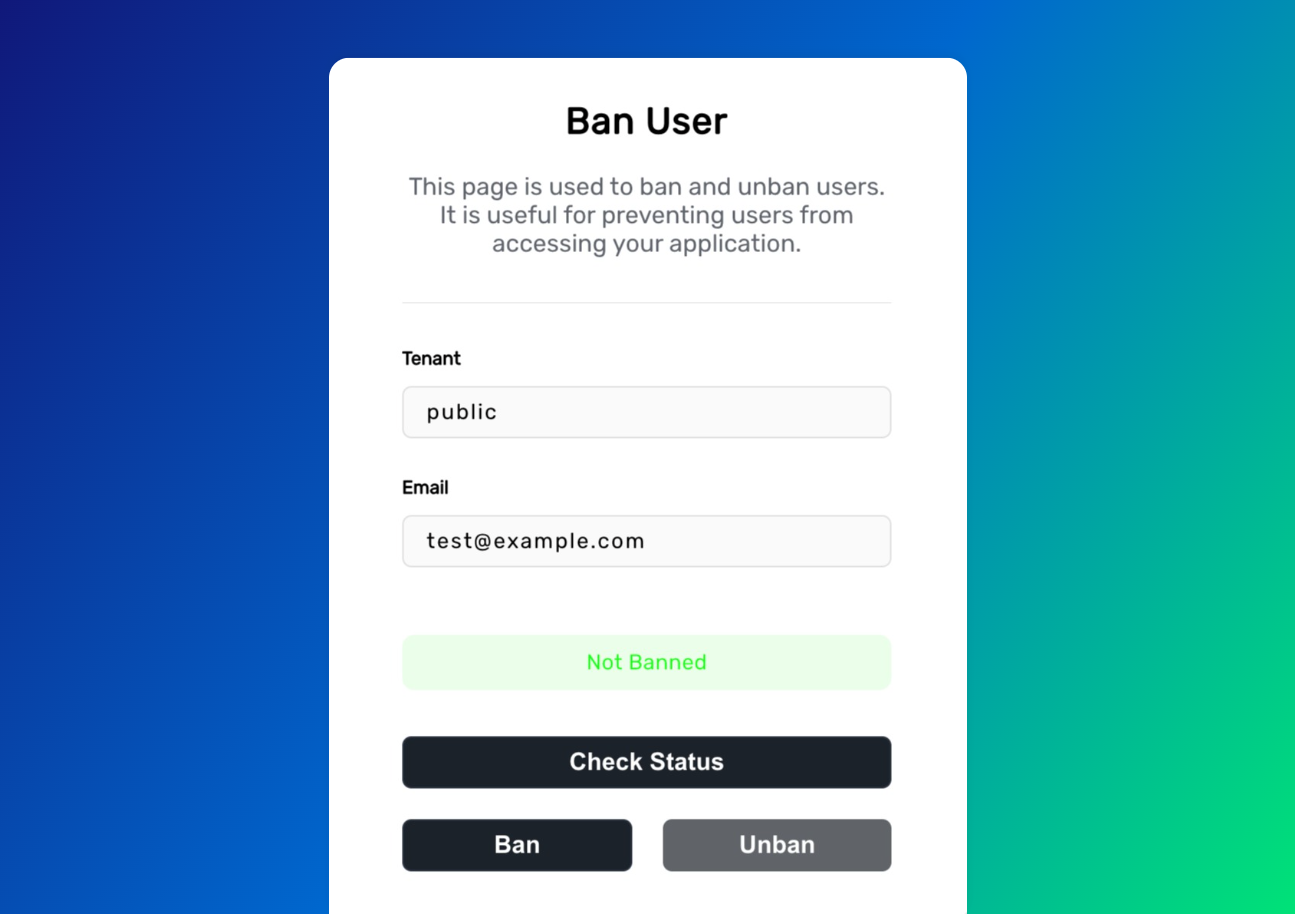
From the interface you can check the banning status of a user. Based on that status, you can either ban or remove the ban for that account.
3.2 Using direct API calls
You can also manage user bans programmatically using the exposed API endpoints.
Ban/unban user
// Ban a user
const banResponse = await fetch("/plugin/supertokens-plugin-user-banning/ban?tenantId=public", {
  method: "POST",
  credentials: "include", // Include session cookies
  headers: {
    "Content-Type": "application/json",
  },
  body: JSON.stringify({
    email: "user@example.com",
    // You can also pass the userId instead of the email
    // userId: "user123",
    isBanned: true, // true to ban, false to remove ban
  }),
});

const banResult = await banResponse.json();
if (banResult.status === "OK") {
  console.log("User banned successfully");
} else {
  console.error("Failed to ban user:", banResult.message);
}

// Remove ban from a user
const unbanResponse = await fetch("/plugin/supertokens-plugin-user-banning/ban?tenantId=public", {
  method: "POST",
  credentials: "include",
  headers: {
    "Content-Type": "application/json",
  },
  body: JSON.stringify({
    email: "user@example.com",
    isBanned: false,
  }),
});
Check ban status
// Check if a user is banned
const statusResponse = await fetch(
  "/plugin/supertokens-plugin-user-banning/ban?tenantId=public&email=user@example.com",
  {
    method: "GET",
    credentials: "include",
  },
);

const status = await statusResponse.json();
if (status.status === "OK") {
  console.log("User is banned:", status.banned);
} else {
  console.error("Error checking ban status:", status.message);
}
Customization
Implement a custom user interface
To create a custom user interface you can use the usePluginContext hook.
It allows you to access the plugin’s API methods and configuration in custom React components:
import { usePluginContext } from "@supertokens-plugins/user-banning-react";

function MyCustomAdminComponent() {
  const { api, pluginConfig, t } = usePluginContext();

  const handleBanUser = async (email: string) => {
    try {
      const result = await api.updateBanStatus("public", email, true);
      if (result.status === "OK") {
        console.log("User banned successfully");
      } else {
        console.error("Failed to ban user:", result.message);
      }
    } catch (error) {
      console.error("Error:", error);
    }
  };

  const handleCheckBanStatus = async (email: string) => {
    try {
      const result = await api.getBanStatus("public", email);
      if (result.status === "OK") {
        console.log("User has ban:", result.banned);
      } else {
        console.error("Error:", result.message);
      }
    } catch (error) {
      console.error("Error:", error);
    }
  };

  return (
    <div>
      <h2>{t("PL_UB_BAN_PAGE_TITLE")}</h2>
      <button onClick={() => handleBanUser("user@example.com")}>{t("PL_UB_BAN_PAGE_BAN_BUTTON")}</button>
      <button onClick={() => handleCheckBanStatus("user@example.com")}>Check Ban Status</button>
    </div>
  );
}
Next steps
Besides user banning you can also look into other user management features and security measures: